
Florist Theme for Ghost: Show This Week's Bouquets, Take Orders and Add a Shop Map
A step-by-step guide to the Florist theme for Ghost: put this week's bouquets online with prices and tags, take orders from every Order button, show wedding and event work, and add reviews, a shop map, your menu and SEO.

Michal Wlosik
· 7 min read
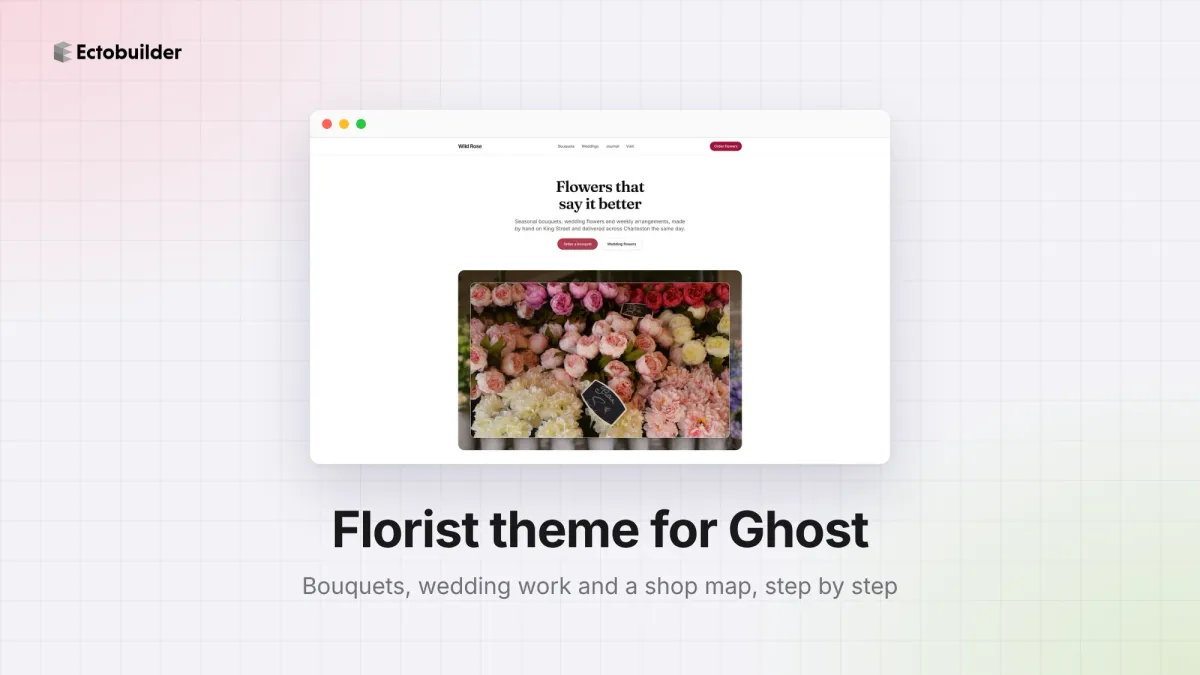
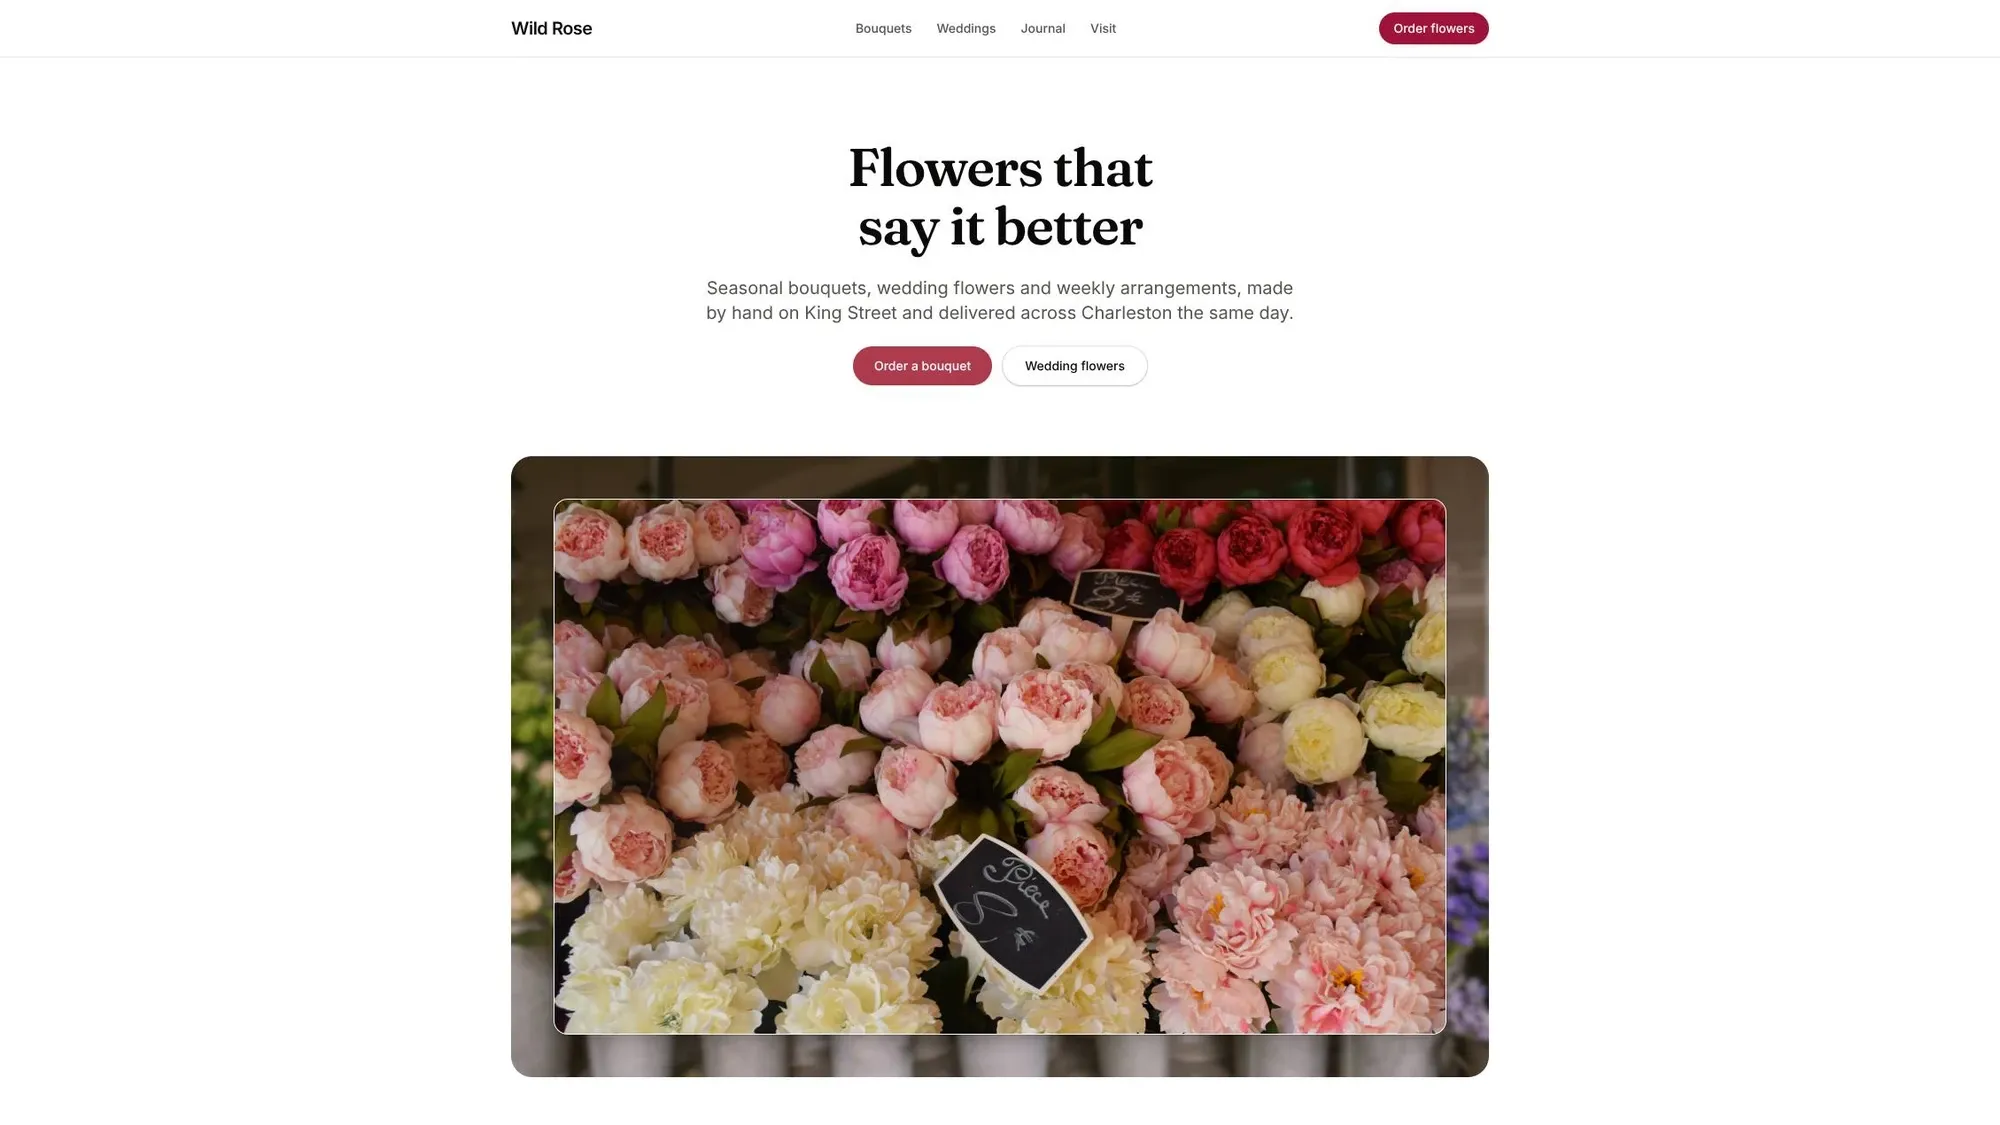
The Florist theme is an Ectobuilder theme for flower shops and floral designers running their site on Ghost. Its homepage opens with a framed photo of peonies and an Order a bouquet button, then shows this week’s bouquets with photos, prices and tags, a bento of wedding and event work, customer reviews and a map to the shop with your opening hours.
This guide walks through what most florists set up first:
- Put the bouquets of the week online, with prices and tags.
- Take orders from every Order button.
- Show your wedding and event work.
- Add customer reviews.
- Add your shop address and opening hours, with a map.
- Set up your menu, in the header and the footer.
- Check your SEO with Site audit before you launch.
To follow along, open the theme from the Ectobuilder theme gallery and connect your Ghost site under Settings → Integrations → Ghost Admin API.

Want this theme for your site? Open the Florist theme in Ectobuilder and make it yours. Starting is free, and you only pay if you’re happy with the design.
Part 1: Put the bouquets of the week online
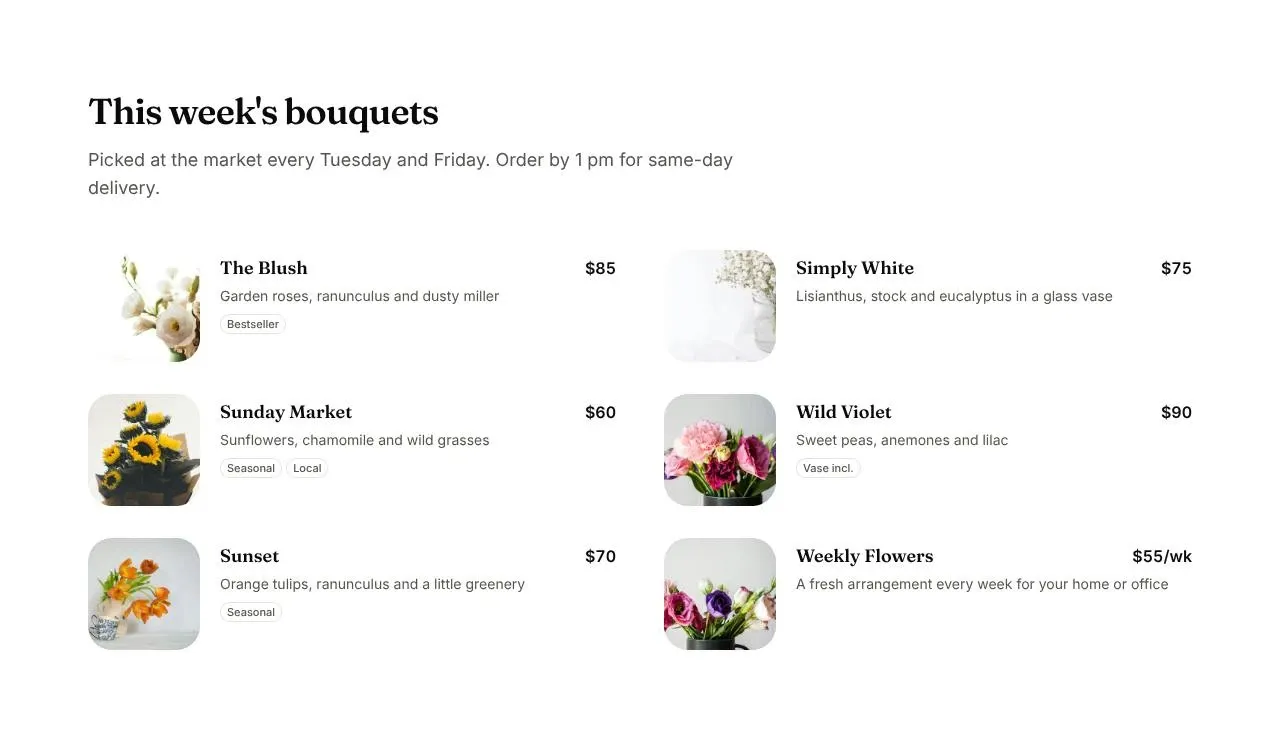
This week’s bouquets lists six arrangements in two columns. Each has a square photo, a name, a price, one line about the flowers in it and, on some, small tags like Bestseller, Seasonal, Local or Vase incl.
Step 1: Change the bouquets
- Double-click a name, price or description to type over it. Name the flowers in each one, as the sample does: Garden roses, ranunculus and dusty miller. People search for flowers by name.
- Click a photo, then Replace in the Image panel to upload your own. The photos are shown square, so shoot the bouquet in the middle of the frame against a plain wall.
- Fill in each photo’s Description too. It helps your bouquets show up in image search.
- To add a bouquet, click an existing one and use Items in the panel to duplicate it. The arrows move it, and the cross removes it.
Step 2: Use the tags
The tags tell people at a glance what’s special: your bestseller, what’s in season, what’s grown nearby, or that the vase is included. Double-click one to rename it, and remove the ones that don’t apply. Keep them to one or two words, and use the same few across the list so they mean something.
The list is part of the theme, so a change goes live when you click Deploy. Update it on market days, and keep the line under the heading true: Order by 1 pm for same-day delivery.
Part 2: Take orders
The Order flowers button in the header and Order a bouquet on the hero both link to #booking. They open whatever page you add as your booking page, so they work with an online shop or an order form as well as a calendar.
- Copy the address of your order page: your Square Online or Shopify shop, a delivery service you already use, or a simple order form.
- In Ectobuilder, open Settings → Integrations → Booking page and paste it.
- Click Deploy and try both buttons on your phone. Gift orders are often placed in a hurry from one.
Booking tools like Calendly or Cal.com open in a window over your site; a shop or a form that doesn’t allow that opens in a new tab. A Calendly page is handy for a different job too: let couples book a wedding consultation from your Weddings page.
Part 3: Show your wedding and event work
Wedding & event flowers is a bento of five photos, one large and four small, under a line about how much event work you do: about thirty weddings a year, from Lowcountry barns to Rainbow Row.
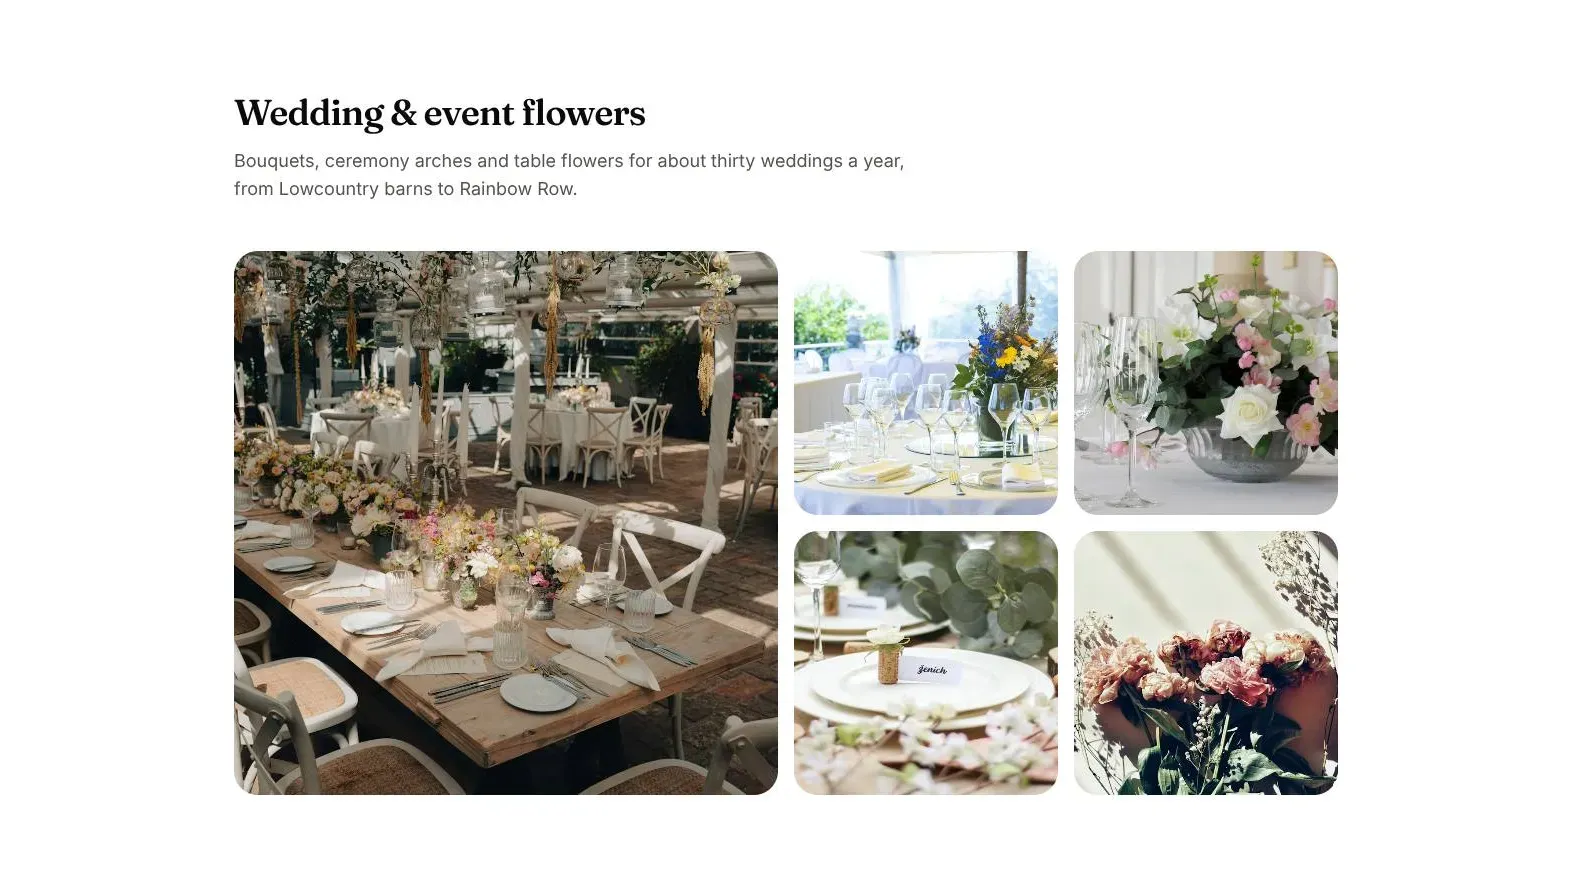
- Put your most complete setup, a whole room or a long table, in the large tile. Use the small tiles for close-ups: a centerpiece, a bridal bouquet, a place setting.
- Click each photo and use Replace to upload your own, and write a Description that names the flowers and the venue.
- Change the line under the heading to say what events you take and where.
The hero’s Wedding flowers button and the Weddings link in the menu go to /weddings/. Create a page in Ghost with that address and use it for packages, a starting price and how to enquire. A contact form on that page collects dates and venues straight to your inbox.
To let visitors open the photos full size, set Click to enlarge to All under Settings → Features (more in the lightbox guide).
Part 4: Add customer reviews
Kind words holds three short reviews, each with a name, a small photo and what they ordered: a wedding, a same-day delivery, weekly office flowers.
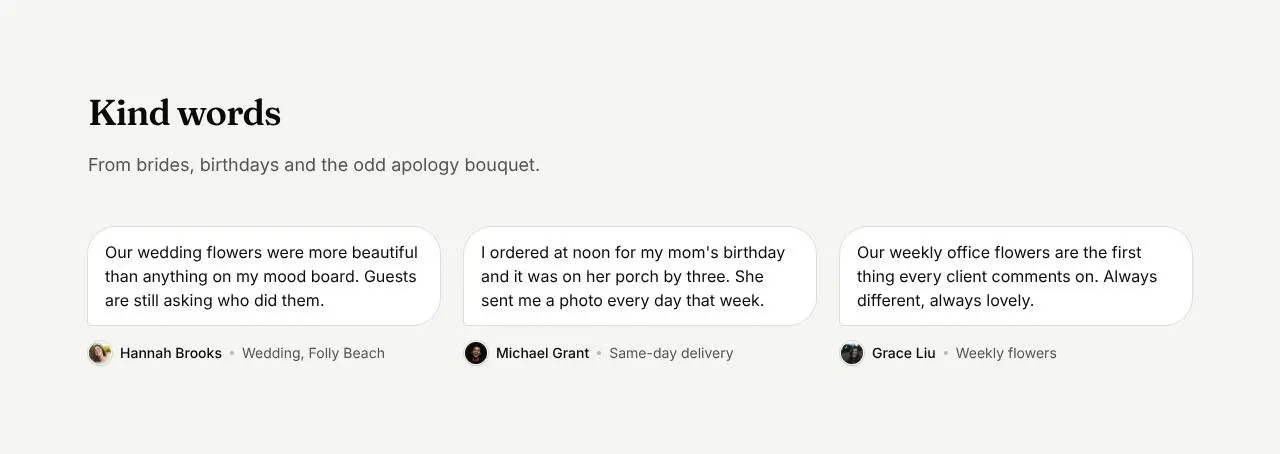
Pick one review for each kind of order you want more of. A bride, someone who needed flowers by three o’clock and a regular office client cover most of a flower shop’s work. Copy real reviews from Google or your messages, with the customer’s permission, and double-click the text, name and order to type over the samples.
Part 5: Add your shop address and opening hours
Come say hello shows your address, opening hours, phone and email beside a map. The Visit link in the header and Contact in the footer scroll down to it.
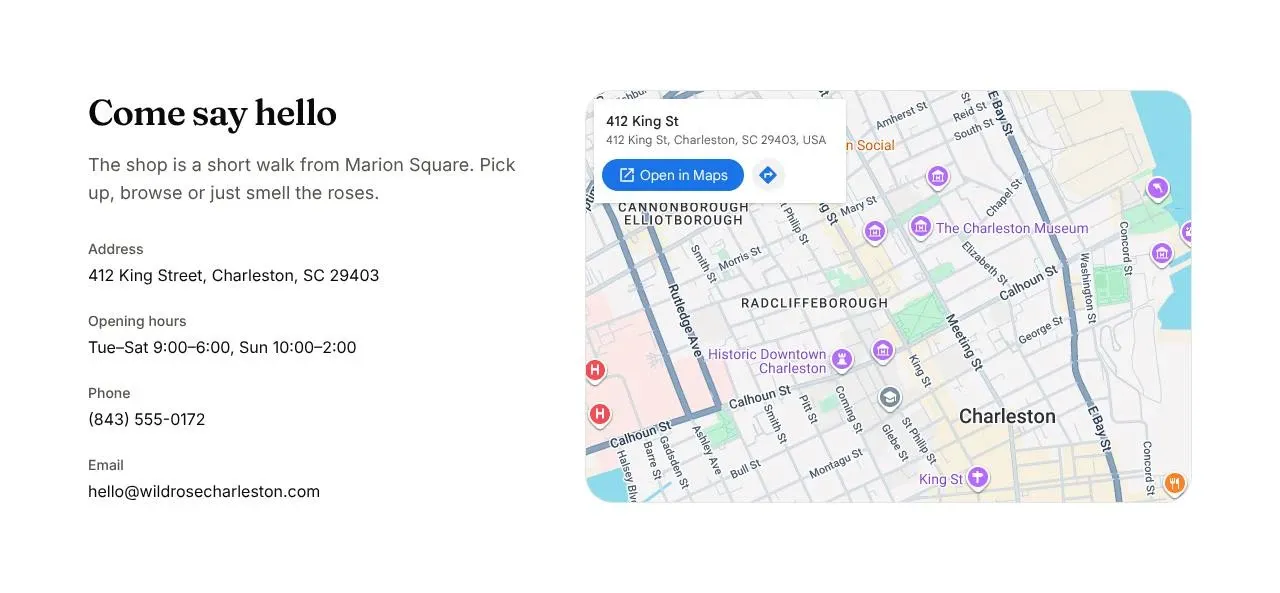
- Click the map. Under Map in the panel, type your address in Address. Anything Google Maps can find works, including your shop’s name.
- Double-click the address, hours, phone and email to type yours, and update the phone and email links so a tap calls or writes to you.
- Change the line under the heading to help people find you, like a short walk from Marion Square.
Keep the hours in the same words as on your Google Business profile, and change both before holidays. Valentine’s Day and Mother’s Day are when people check.
Part 6: Set up your menu
The header shows Bouquets, Weddings, Journal and Visit, and the footer has Weddings, Privacy and Contact. These links live in Ghost, and you edit them in the Menu panel in the left rail, right beside your page.
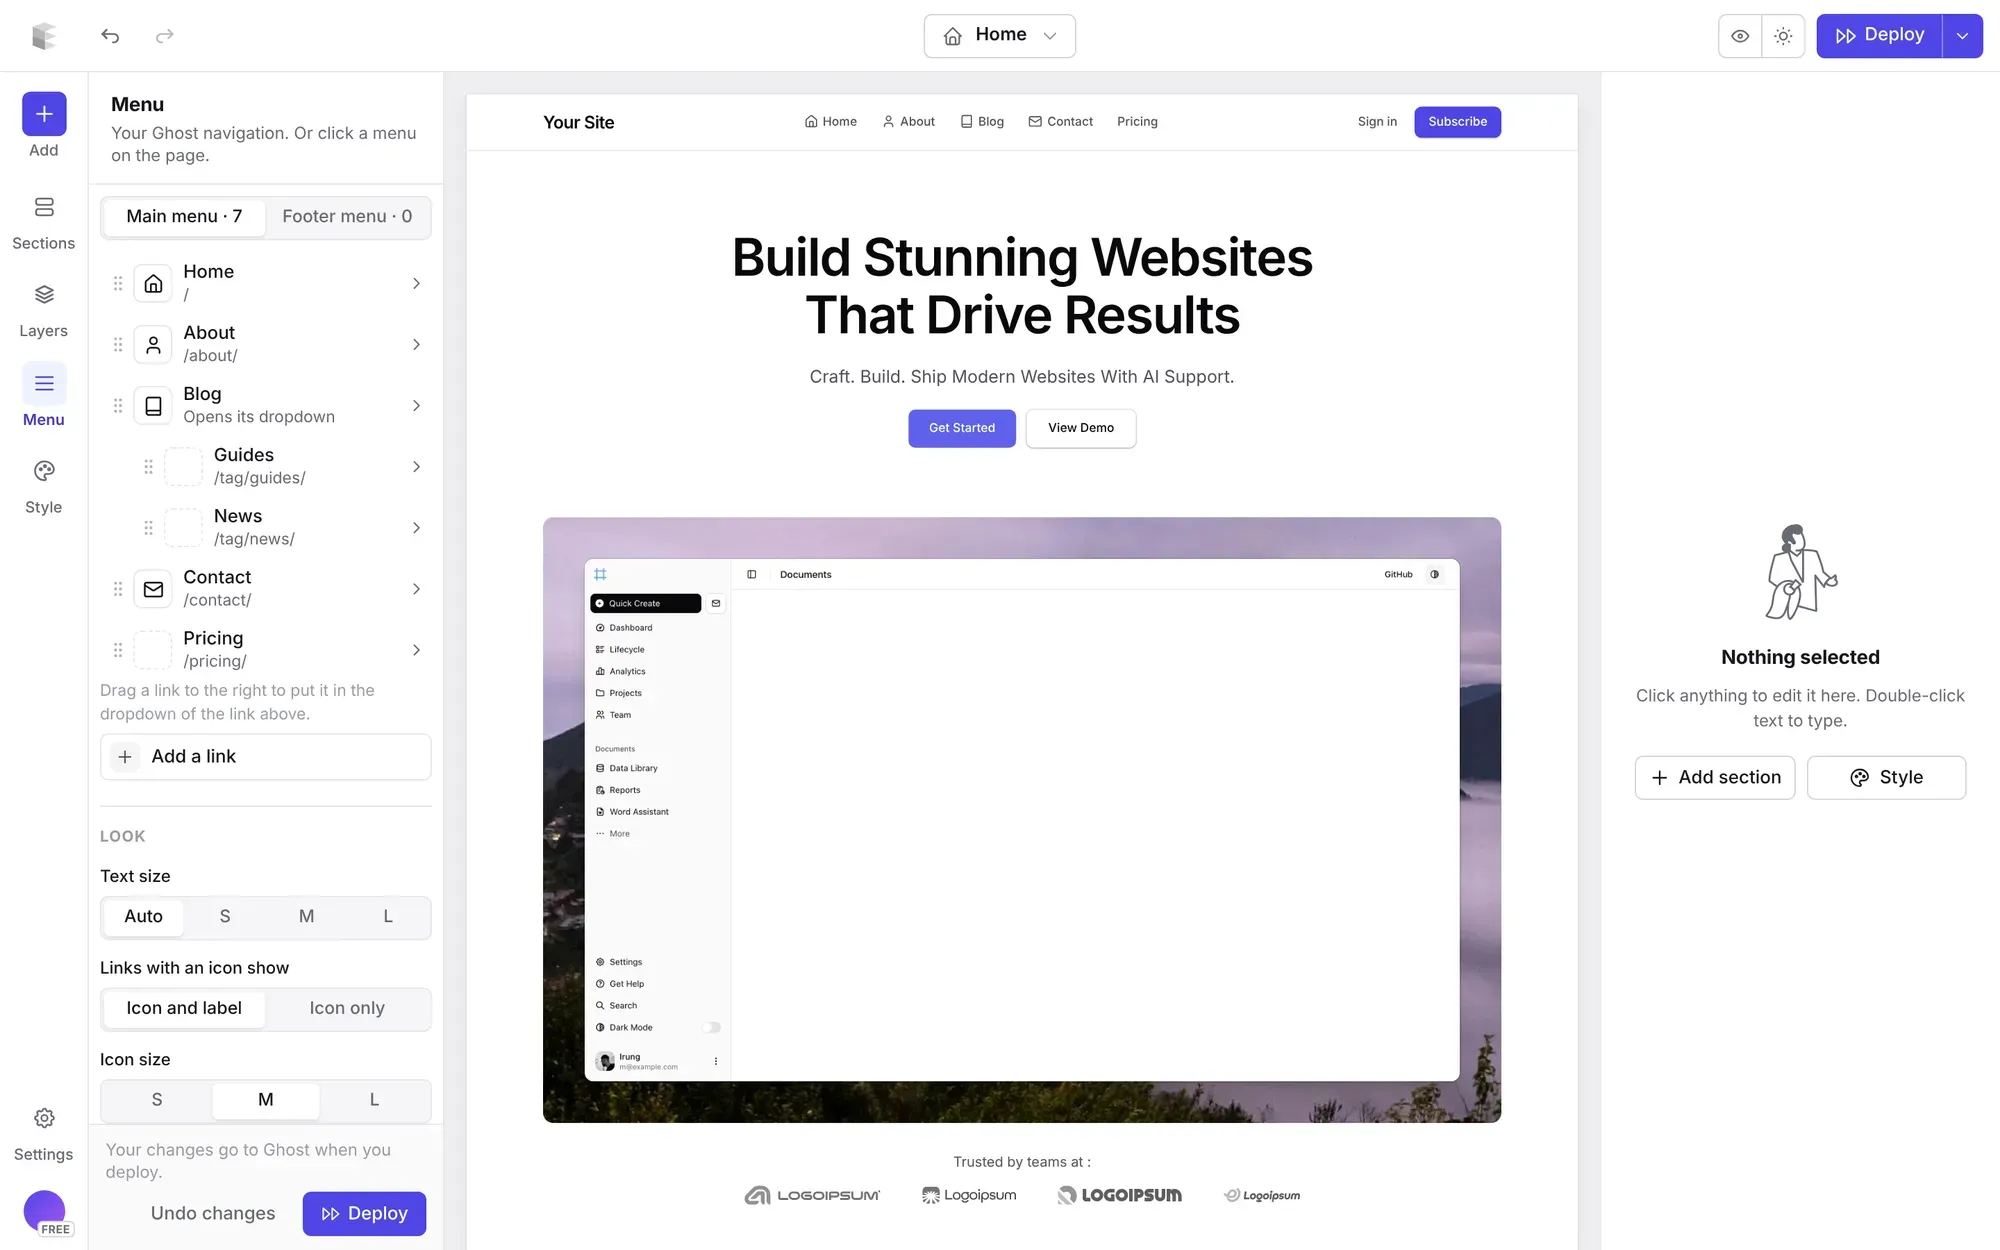
- Add, rename and reorder links. Add Subscriptions for weekly flowers, or Events next to Weddings, and drag them into place.
- Dropdowns. Drag a link slightly to the right to put it under the one above, for example Weddings, Events and Sympathy under a Flowers for… heading.
- Footer columns. Switch to the Footer menu, set Layout to Columns, and add a Shop column and a Visit column.
- Icons. Give a link an icon, like a map pin next to Visit.
There’s no separate save. Your changes go to Ghost when you click Deploy. You need a Ghost staff token once, under Settings → Integrations. The menu editor guide covers every step.
Part 7: Check your SEO with Site audit
Most flower orders start with a search like florist near me or same-day flowers Charleston. Before you launch, check what search engines see.
- Open Settings → Site audit and click Run audit. It reads every public page of your Ghost site in about a minute.
- Read the two lists. To fix holds what costs you visibility now, like pages with no meta description or links that lead nowhere. To improve holds the rest, like an empty site description or no sharing image.
- Click Auto fix to have the descriptions written for you. You see every suggestion first, can edit or untick any of them, and nothing is saved until you click Apply.
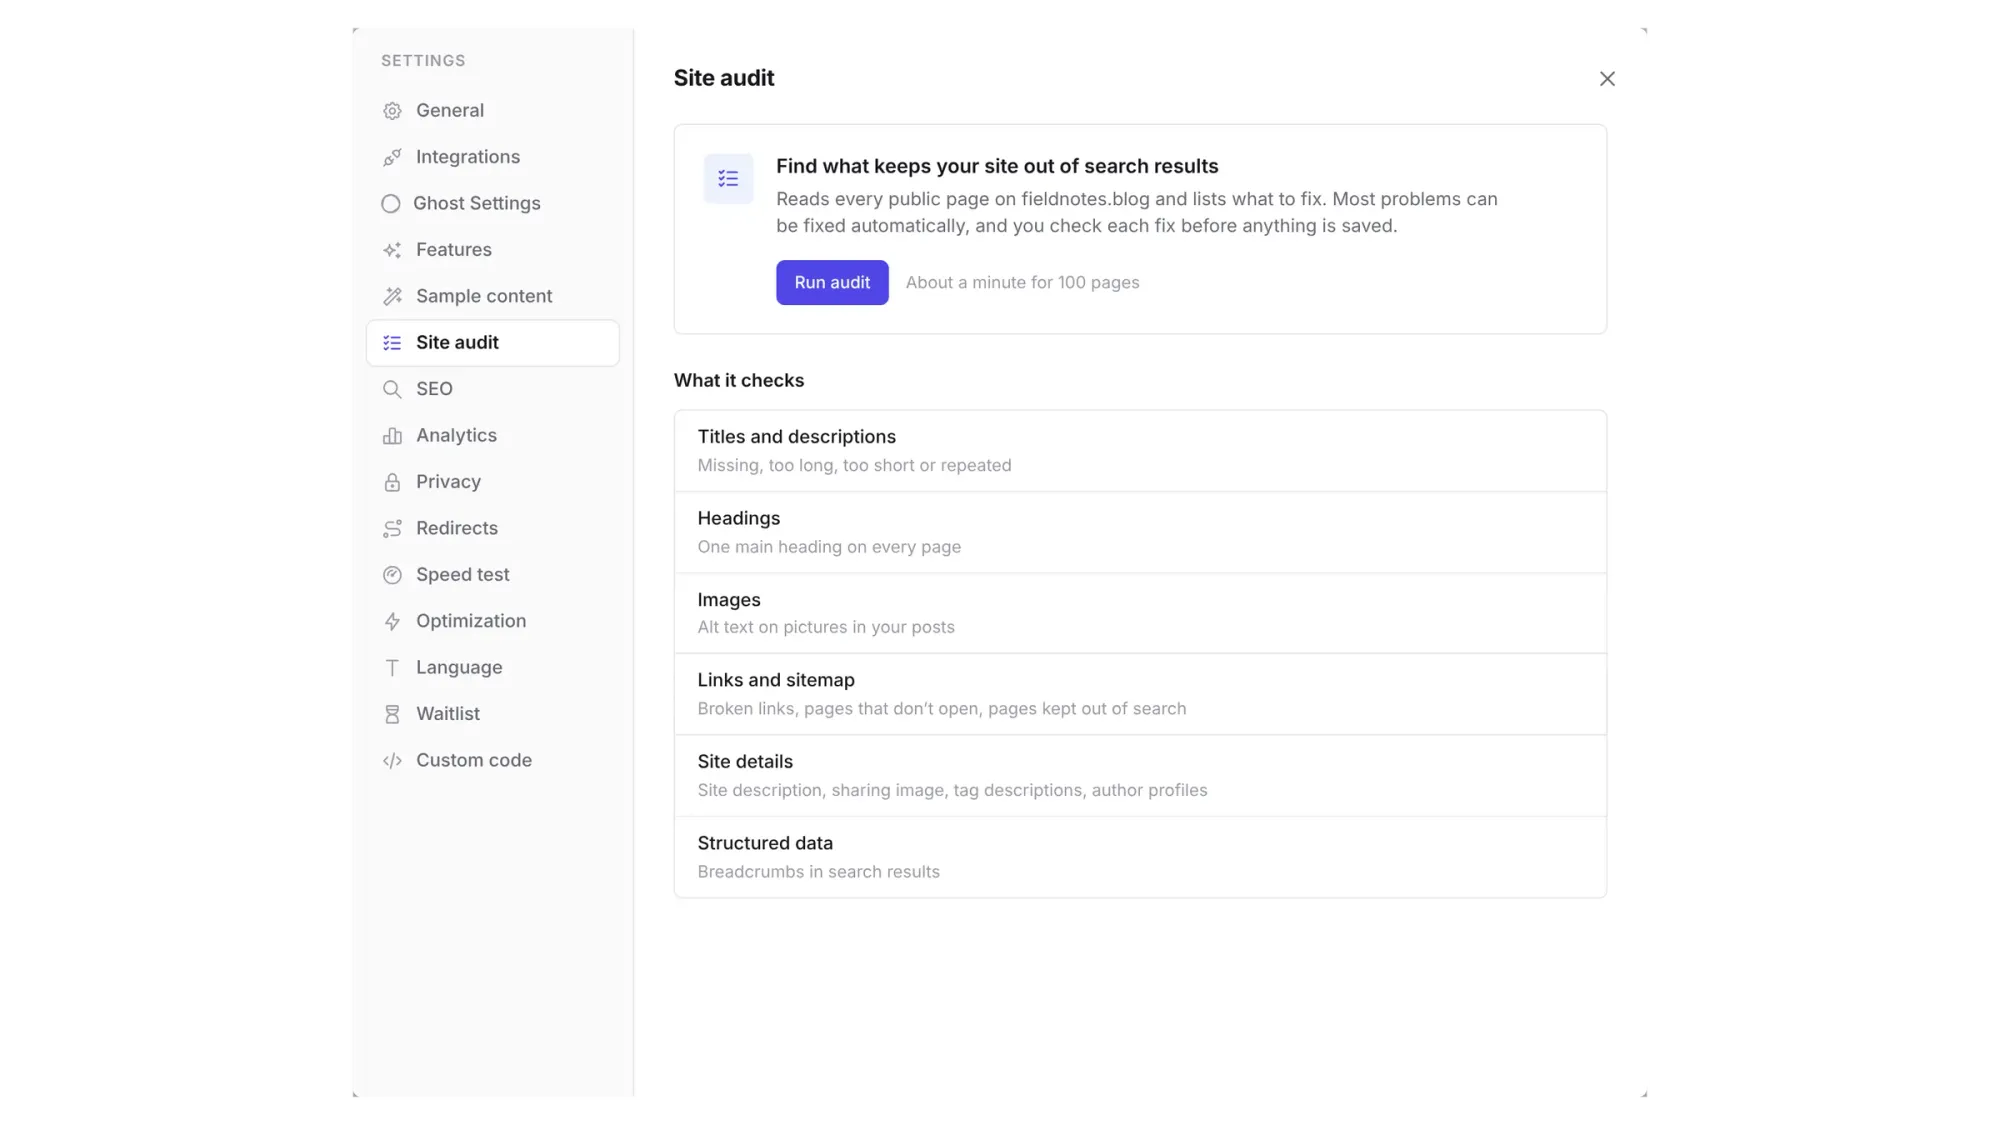
For a flower shop, start with three things: a site description that says what you sell, where, and that you deliver, a sharing image of a bouquet for links sent in messages, and a description for the Weddings page. If you moved from an old shop site, look for broken links and send each old address to its new page under Settings → Redirects. More in the Site audit guide.
Ready to build yours? Everything in this guide works on your own copy of the Florist theme. Start free, connect your Ghost site when you’re ready, and only pay if you like the result.
Next steps
- Use the footer’s Get the flower letter signup to tell people what’s in season. Set up your newsletter in Ghost Admin under Settings → Newsletters, then send a post with Publish and email. A note before Valentine’s Day and Mother’s Day is worth sending.
- Change the colors and fonts under Style. They apply to every page at once. To match your shop sign, see custom fonts in Ghost.
- Use the Journal for seasonal flowers, care tips and real weddings. They help people find you in search.
- Serve customers in another language? Translate the theme in one click.
Written by
Founder of Ectobuilder, the AI-powered visual theme editor for Ghost. Indie software builder in Wrocław and co-author of The AdTech Book. I write about Ghost themes, newsletters and building websites with AI.
Comments
Questions or thoughts? Share them below.
Keep reading
PikaPods Custom Domain: Why Only www Works (and How to Fix the Root Domain)
PikaPods maps one custom domain per pod, so yourdomain.com without www stays on a parked page with no SSL. Here's why, and three ways to redirect it to www over HTTPS without touching your email records.
How to Migrate from Kit or beehiiv to Ghost (Subscribers, Paid Members, Posts and Redirects)
Move your newsletter from Kit (ConvertKit) or beehiiv to Ghost step by step: export and import subscribers, deal with paid members and Stripe, bring your posts across, set up redirects and your domain, warm up email sending, and make the new site look right.
How to Use ChatGPT to Create 301 Redirects (Prompts, File Formats and Testing)
Let ChatGPT or Claude match your old URLs to new ones and write the redirect file for Ghost, Apache, Nginx, Netlify or Vercel. Prompts to copy, the mistakes to avoid, and how to test every redirect.