
Swimming School Theme for Ghost: List Lessons by Age, Book Free Trials and Answer Parents' Questions
A step-by-step guide to the Swimming School theme for Ghost: list lessons and prices by age, take free trial bookings, show the pool and your coaches, answer parents' questions, add a map, and check your SEO.

Michal Wlosik
· 7 min read
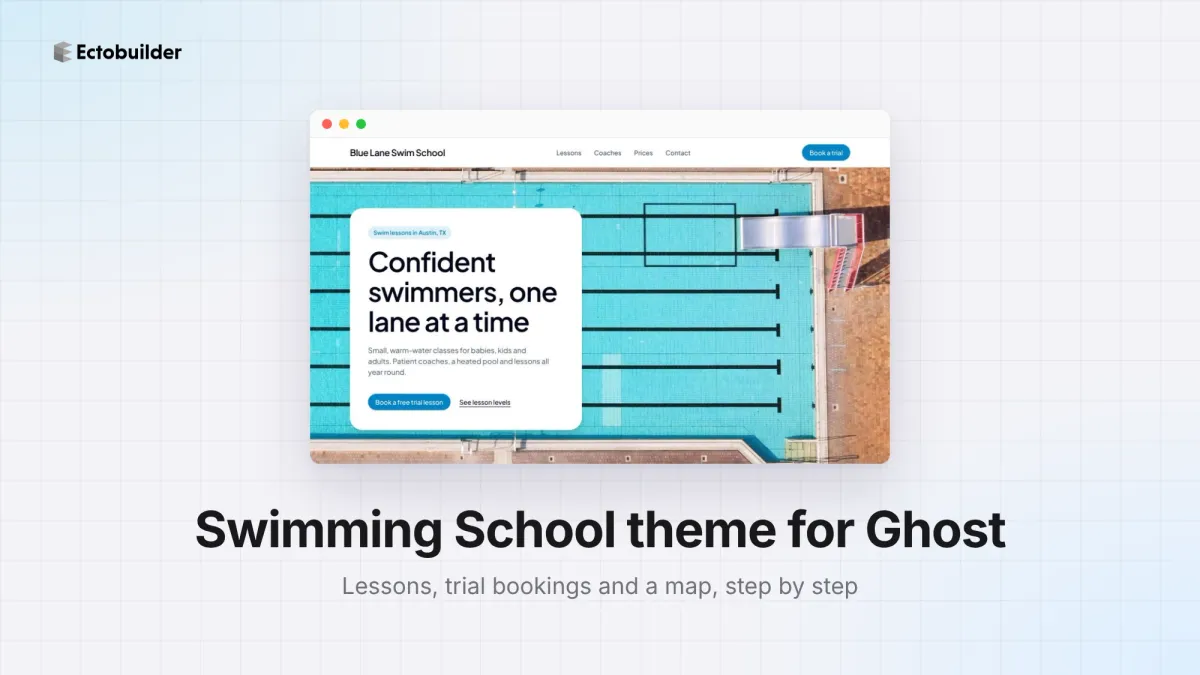
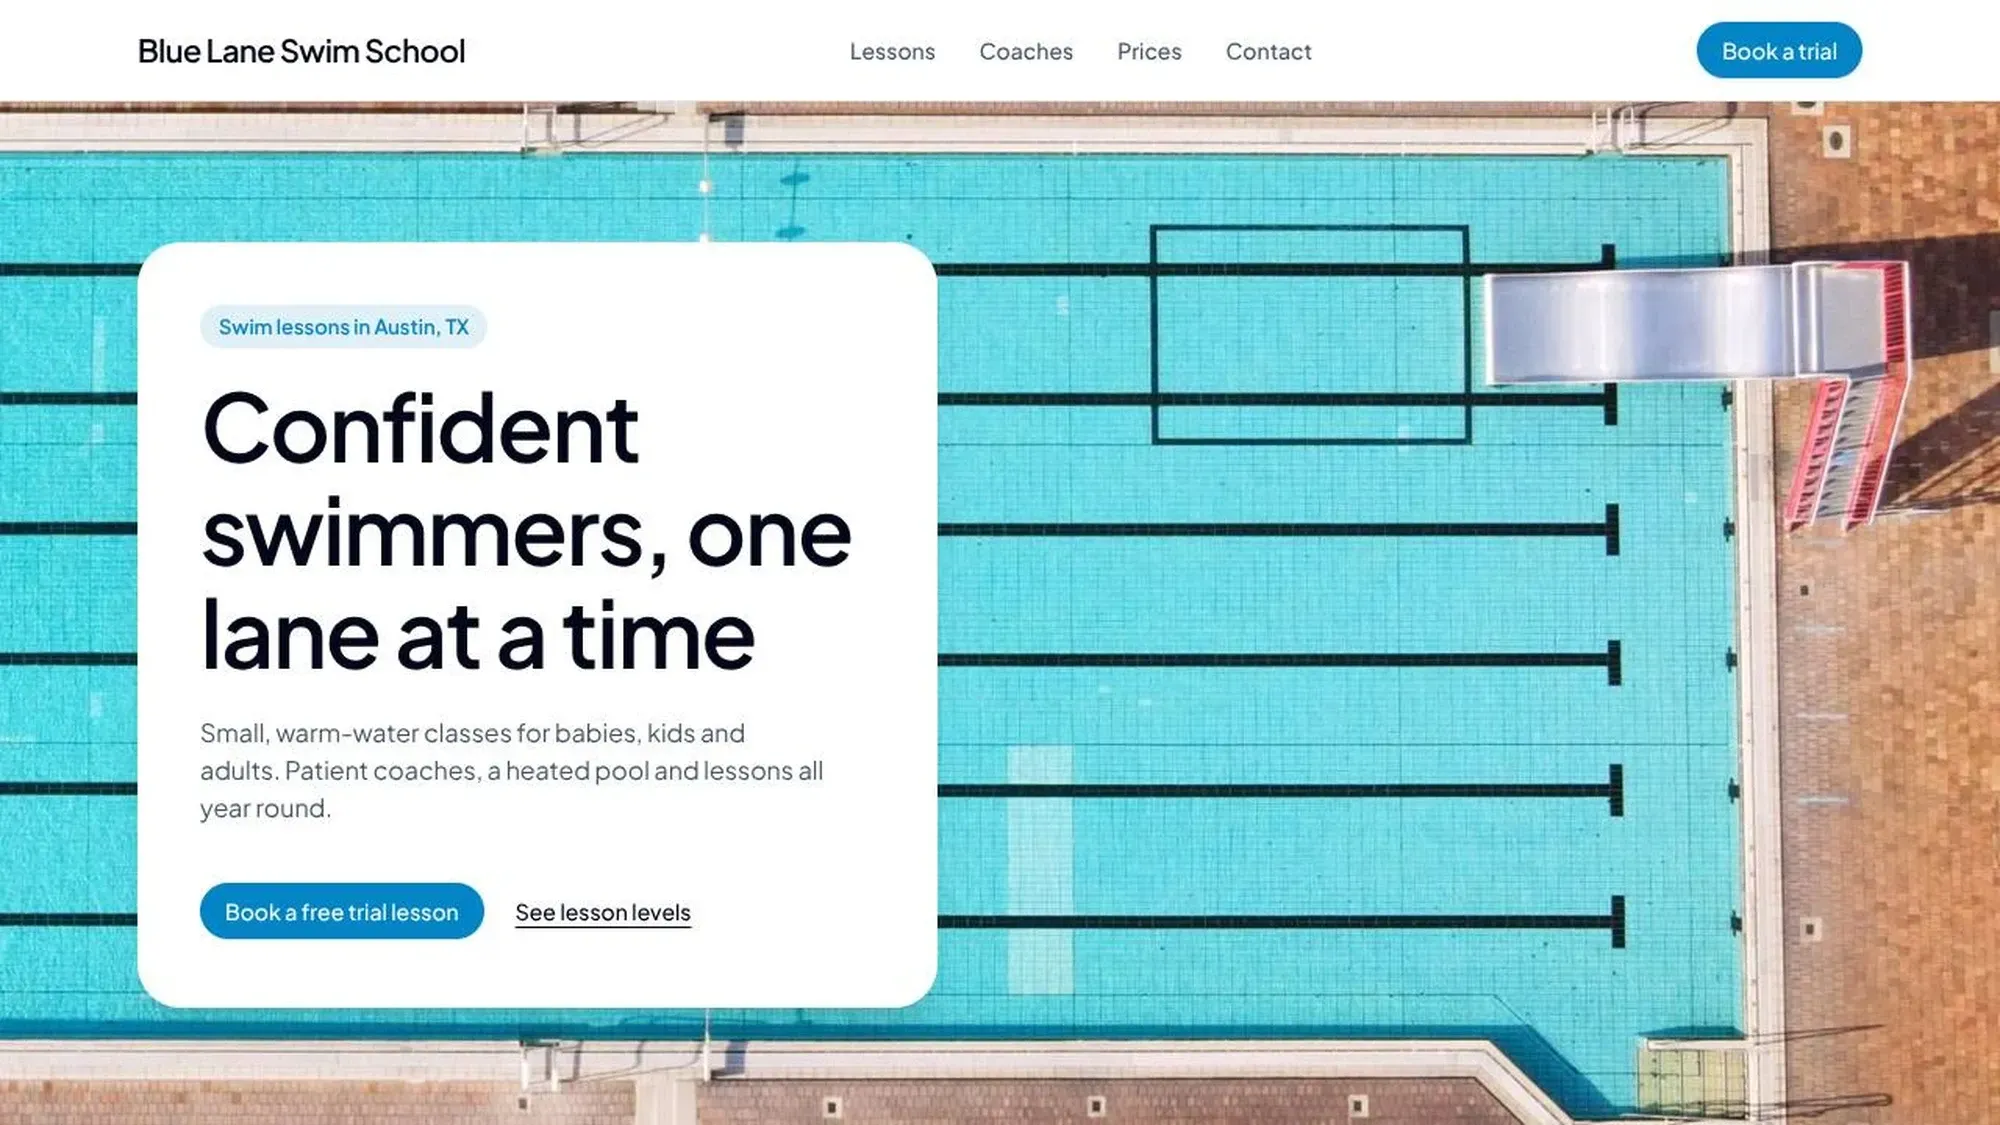
The Swimming School theme is an Ectobuilder theme for swim schools, learn-to-swim programs and swim coaches running their site on Ghost. Its homepage opens with a photo of the pool and a card with a Book a free trial lesson button, then shows three trust numbers, your lessons and prices by age in tabs, the first lesson step by step, a pool gallery, your coaches, reviews from families, an FAQ for parents and a map.
This guide walks through what most swim schools set up first:
- Set out your lessons and prices by age group.
- Take trial bookings and show how the first lesson goes.
- Show the pool, the coaches and what families say.
- Answer parents' questions and add the map, with lesson hours.
- Set up your menu in the Menu panel.
- Check your SEO with Site audit before you launch.
To follow along, open the theme from the Ectobuilder theme gallery and connect your Ghost site under Settings → Integrations → Ghost Admin API.

Want this theme for your site? Open the Swimming School theme in Ectobuilder and make it yours. Starting is free, and you only pay if you’re happy with the design.
Part 1: Set out your lessons and prices
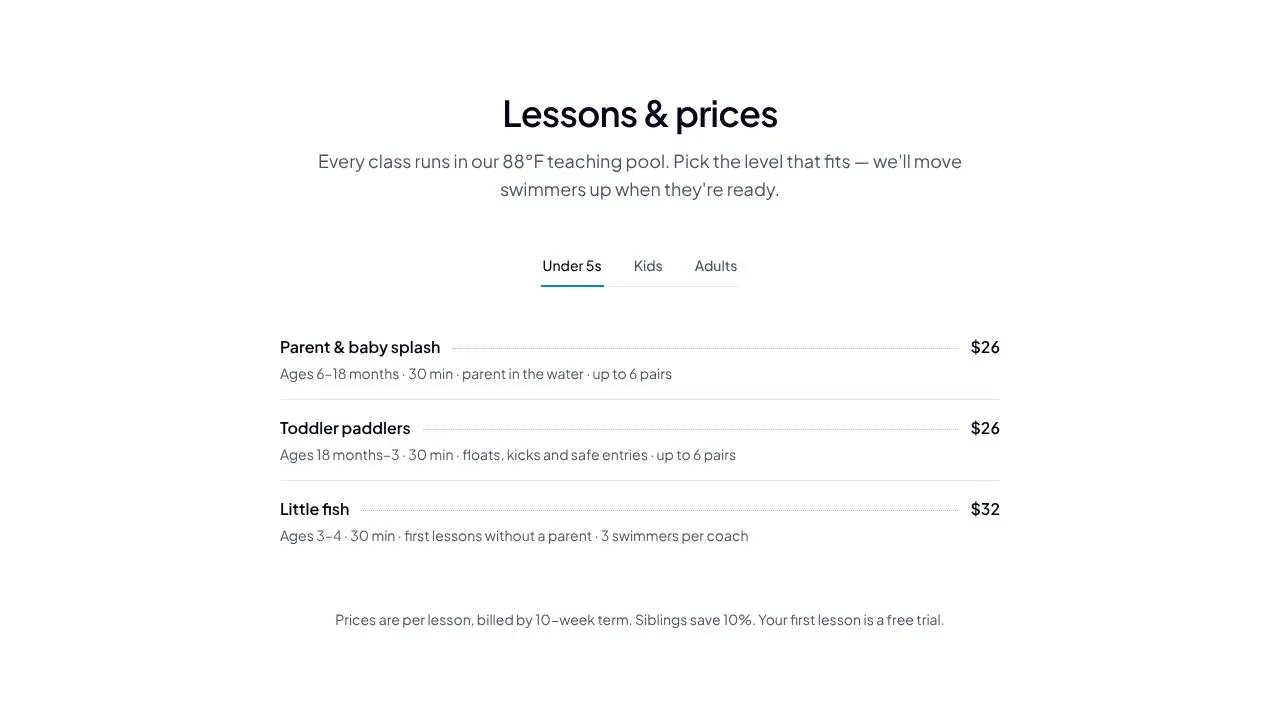
Parents come to a swim school site with two questions: which class fits my child, and what does it cost? The Lessons & prices section answers both in three tabs: Under 5s, Kids and Adults. Each lesson has a name, a price and one line with the ages, length, what it covers and the group size, like Little fish, $32: ages 3–4, 30 min, first lessons without a parent, 3 swimmers per coach.
Step 1: Change the lessons
- Click a tab to open it, then double-click a lesson name, price or description to type over it.
- To add a level, click a lesson and use Items in the panel to duplicate it. The arrows move it, and the cross removes it.
- Put the ages first in each description. Parents scan for their child's age before anything else.
Step 2: Change the tabs and the small print
Double-click a tab label to rename it, for example Babies, School age and Teens & adults. With the section selected, Tabs in the panel adds a tab (a copy of the last one) or removes the last one. The line under the list holds how you charge: Prices are per lesson, billed by 10-week term. Siblings save 10%. Your first lesson is a free trial. Change it to match your terms.
Above the lessons, three numbers sit in a white card: 18 yrs teaching swimming in Austin, 6,500+ swimmers taught and 4 max swimmers per coach. Double-click each one to put in your own. Class size is often the number parents care about most.
Part 2: Take trial bookings
A free trial is the easiest yes for a nervous parent. The Book a trial button in the header, Book a free trial lesson on the hero and Book a trial in the first-lesson section all link to #booking, so one setting connects them all.
Step 1: Add your booking page
Use the booking or class management tool you already have, or a Calendly or Cal.com page with a "Free trial lesson" event. Copy its address, open Settings → Integrations → Booking page in Ectobuilder and paste it.
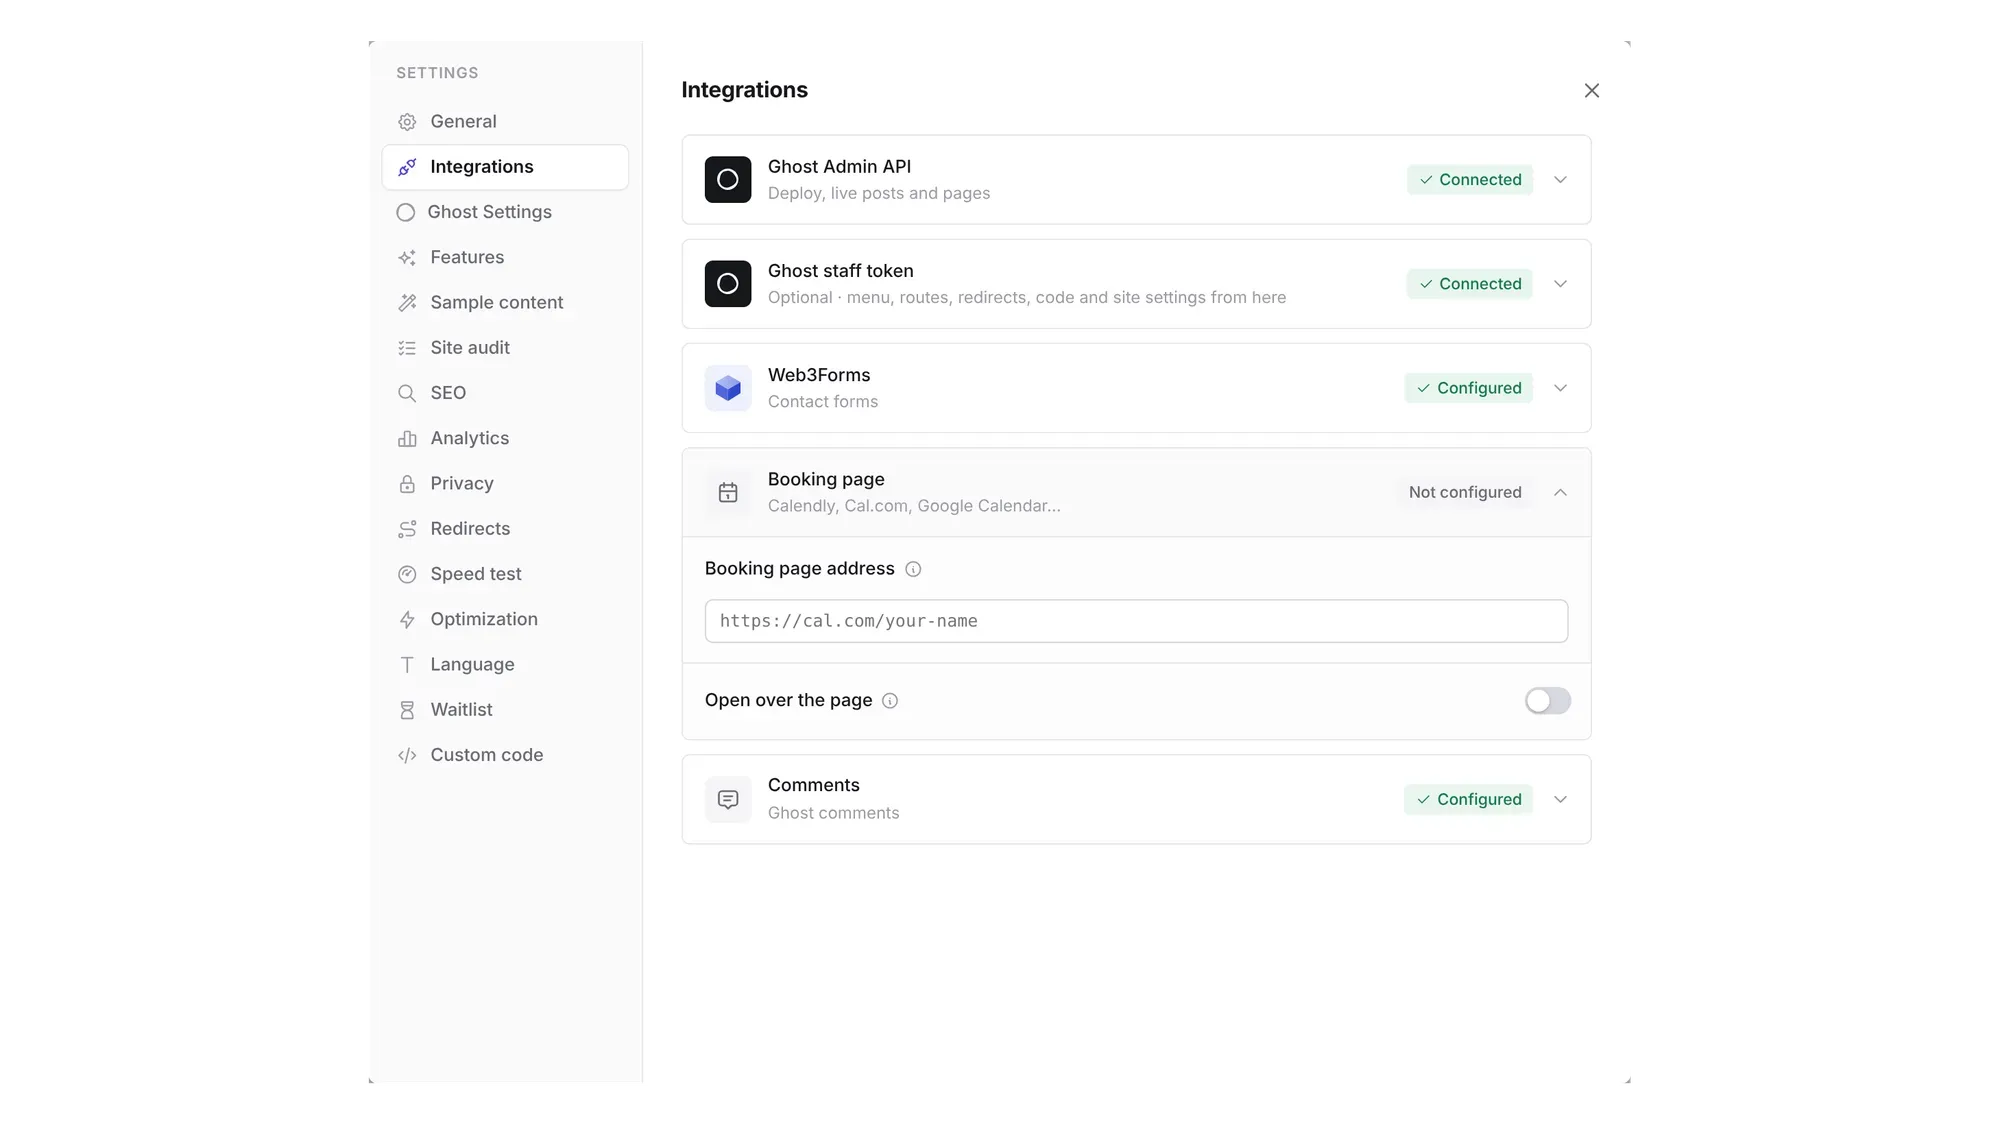
Click Deploy and try the buttons on your phone. To point any other button at your booking page, select it and set its link to #booking. For bookings from Google Search and Maps as well, read How to add online booking to your Ghost site.
Step 2: Show how the first lesson goes
Your first lesson walks parents through the trial in four steps: Book a free trial, Meet your coach on deck, Play, float, kick and Get a level and a plan. Each step has its own photo and button. A line under the open step fills up, and the next step opens by itself.
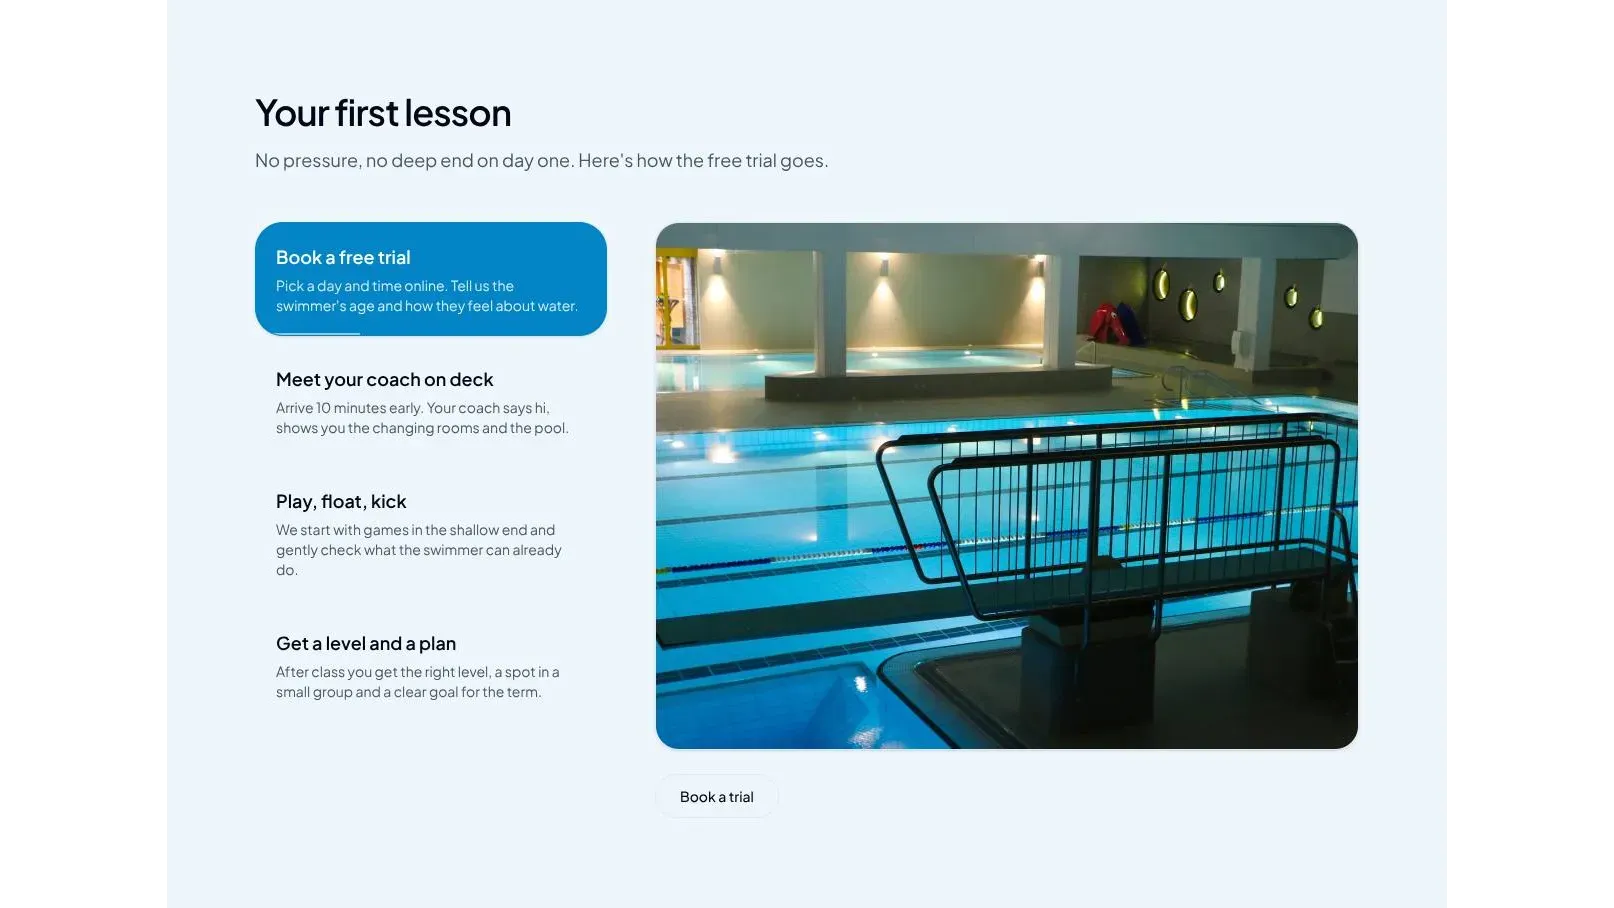
- Double-click the steps to rewrite them for your pool: when to arrive, where to change, who meets them.
- Click a photo and choose Replace in the Image panel to use your own.
- Each step has its own button, like Find the pool or What to bring. Select one to change its words or link.
- With the section selected, Open by themselves sets how many seconds each step stays open, or turns it Off. It stops as soon as a visitor picks a step.
Part 3: Show the pool, the coaches and what families say
Around the pool is a gallery of five photos: one large and four small. The line under the heading says what parents will find, like A heated six-lane pool, a shallow teaching area and plenty of seats for parents.
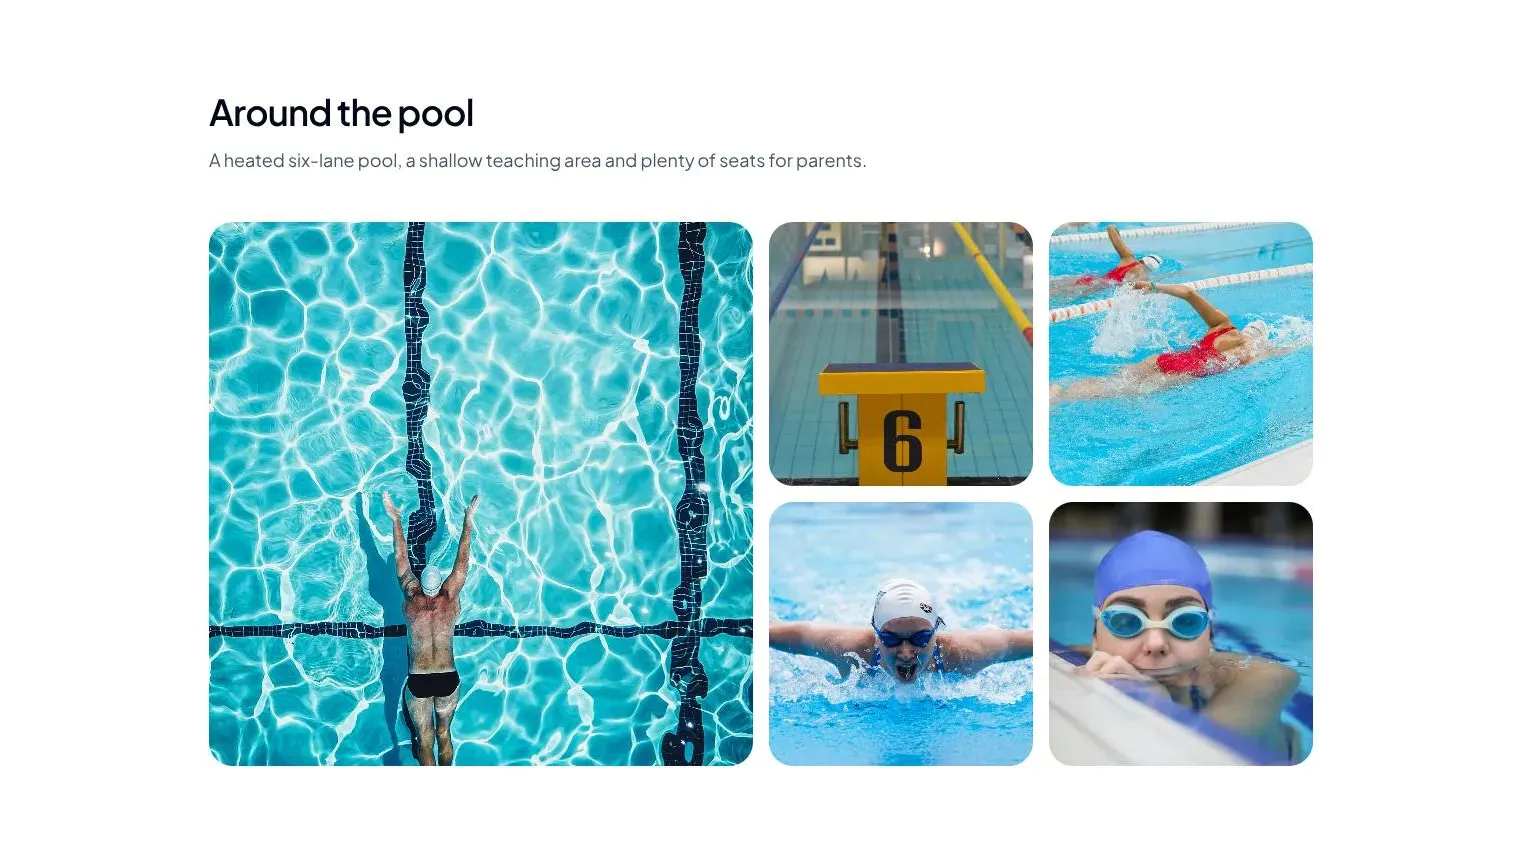
- Click a photo and Replace it with one of your own pool. A wide shot of the whole pool works best in the large spot.
- Fill in each photo's Description, such as Heated teaching pool with a shallow end.
- Only use photos of swimmers whose parents have agreed to it. Shots from behind, or of the empty pool, avoid the question.
To let parents open a photo full size, set Click to enlarge to All under Settings → Features (more in the lightbox guide).
Patient coaches who love the water lists your coaches with their focus and qualifications, like Head coach · ASCA Level 3 or Babies & toddlers · WSI. Parents look for those certificates, so list the ones each coach holds. Add a photo for each coach and use Items to match your team.
What families say is a slider of reviews, each signed with a name and who they are, like Mom of Asha, 3 or Adult learn to swim. Replace the samples with real reviews, with permission. Mix parents of young children with adult learners, so every visitor sees someone like them.
Part 4: Answer parents' questions and add the map
Questions parents ask covers the practical side: What should we bring?, Can parents watch lessons?, What if we miss a lesson?, How warm is the water? and What age can my child start? The What to bring button in the first-lesson section jumps straight here.
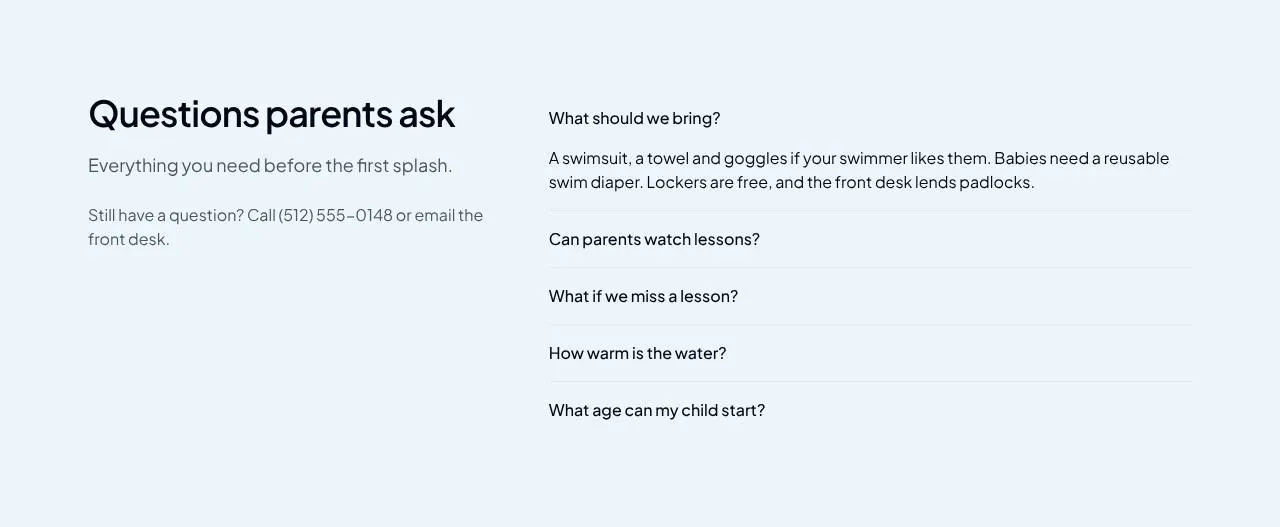
- Double-click a question or answer to edit it. Put your real make-up lesson policy and water temperature here.
- Use Items to add questions, for example about term dates, private lessons or swimmers with additional needs.
- Update the phone number in the line beside the questions: Still have a question? Call (512) 555-0148 or email the front desk.
Visit the pool shows your address, lesson hours, phone and email next to a map. Click the map and type your address in Address under Map in the panel. Then double-click the details to type yours, and update the phone and email links. The label Lesson hours can be renamed too, for example to Front desk hours.
Part 5: Set up your menu
The header links to Lessons, Coaches, Prices and Contact, with Book a trial as a button. These links live in Ghost, and you edit them in the Menu panel, right next to your page. Click Menu in the left rail.
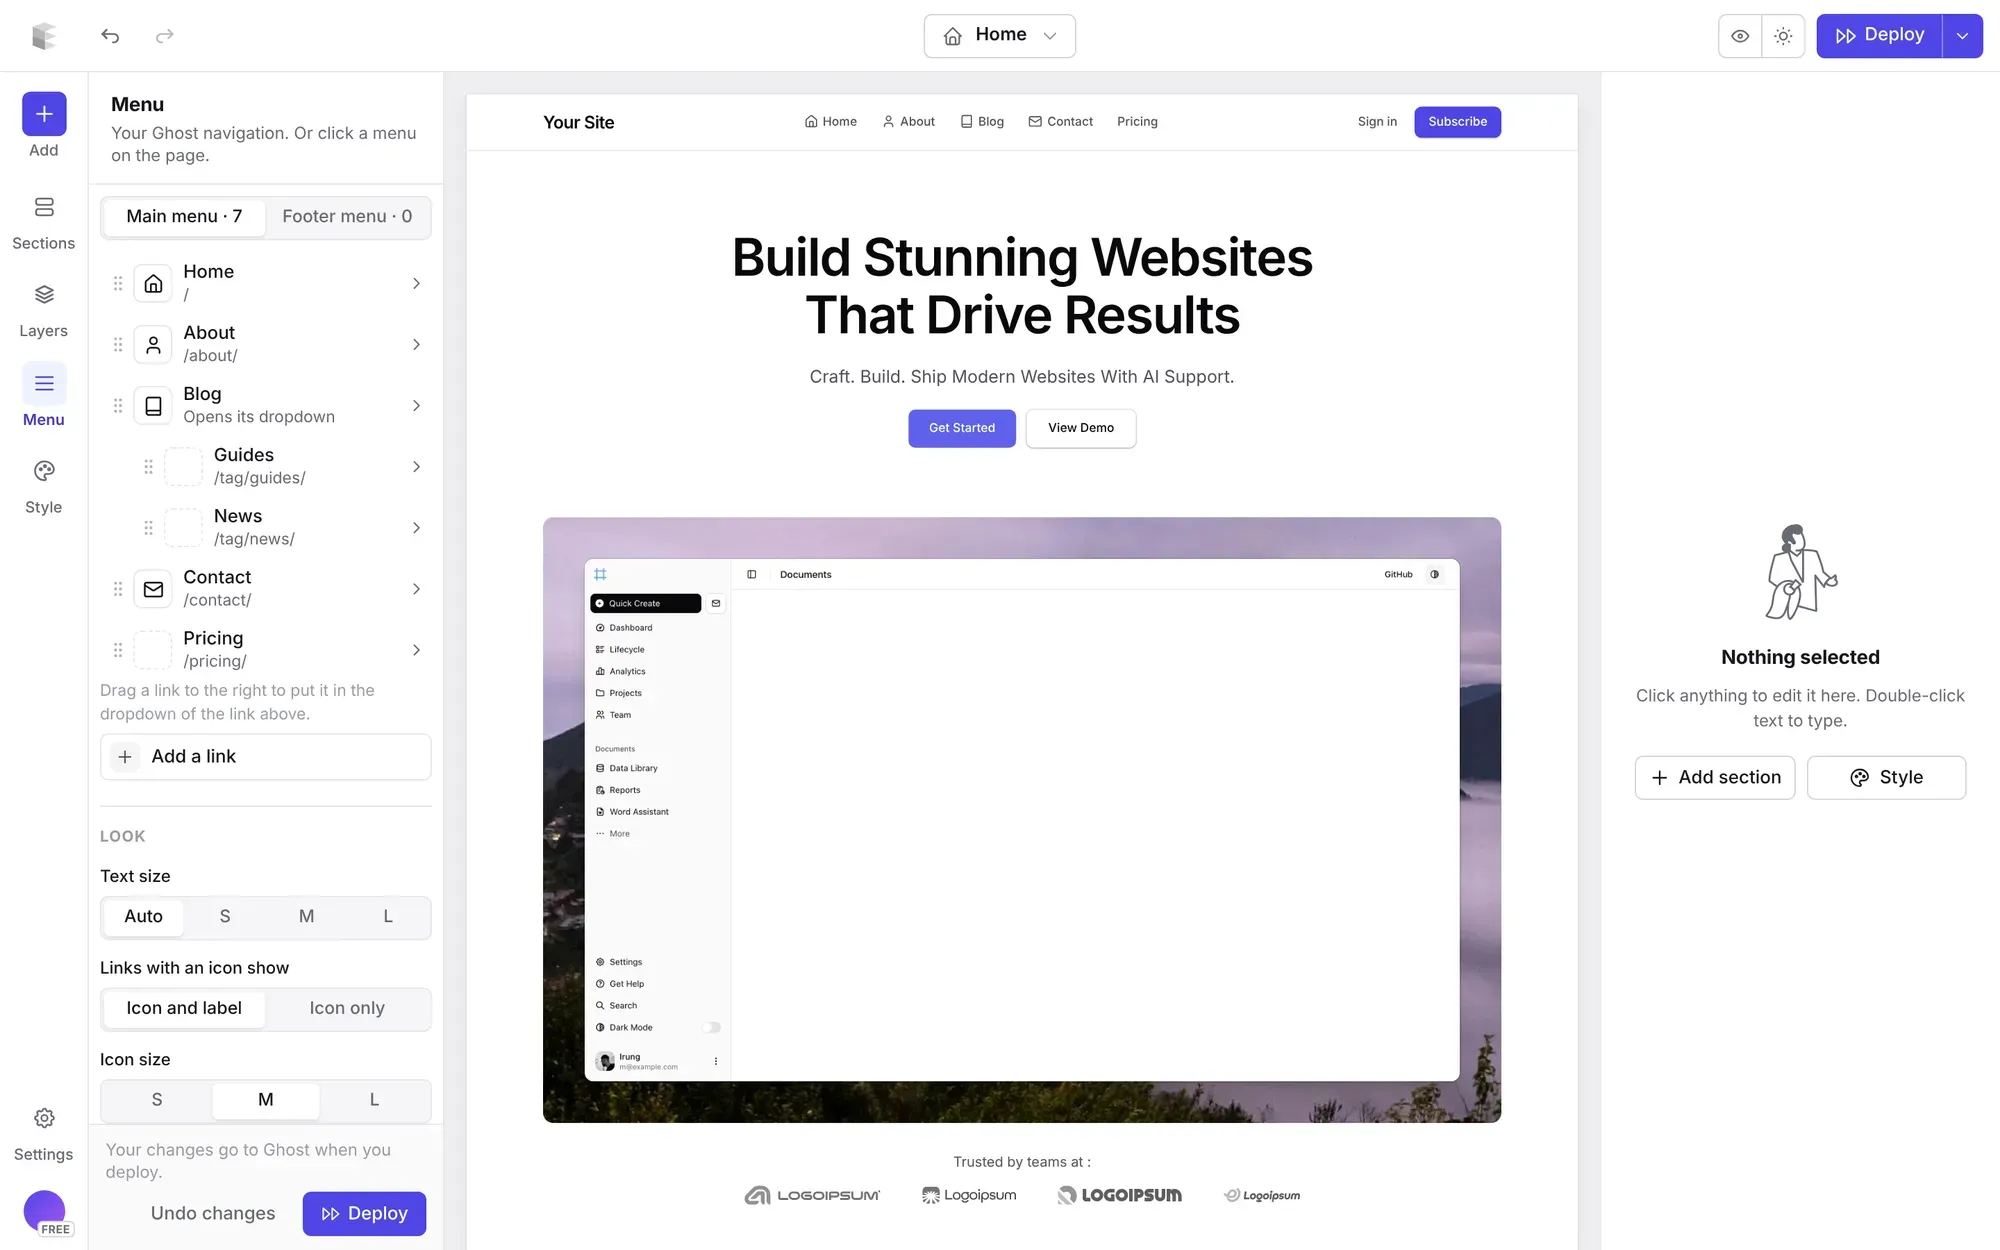
- Add, rename and reorder links. Drag a link slightly to the right to put it in a dropdown, for example Babies, Kids and Adults under Lessons.
- Give links icons, like a phone next to Call us.
- Switch to the Footer menu and set Layout to Columns for footer columns such as Lessons, Parents and Policies.
Each change shows on the page as you make it, and goes to Ghost when you click Deploy. There is no separate save. The Menu panel needs a Ghost staff token once, under Settings → Integrations. The menu editor guide covers every option.
Part 6: Check your SEO with Site audit
Parents search for "swim lessons near me" or "toddler swim classes Austin". Before you launch, open Settings → Site audit and click Run audit. It reads every public page of your Ghost site and lists what it finds under To fix and To improve.
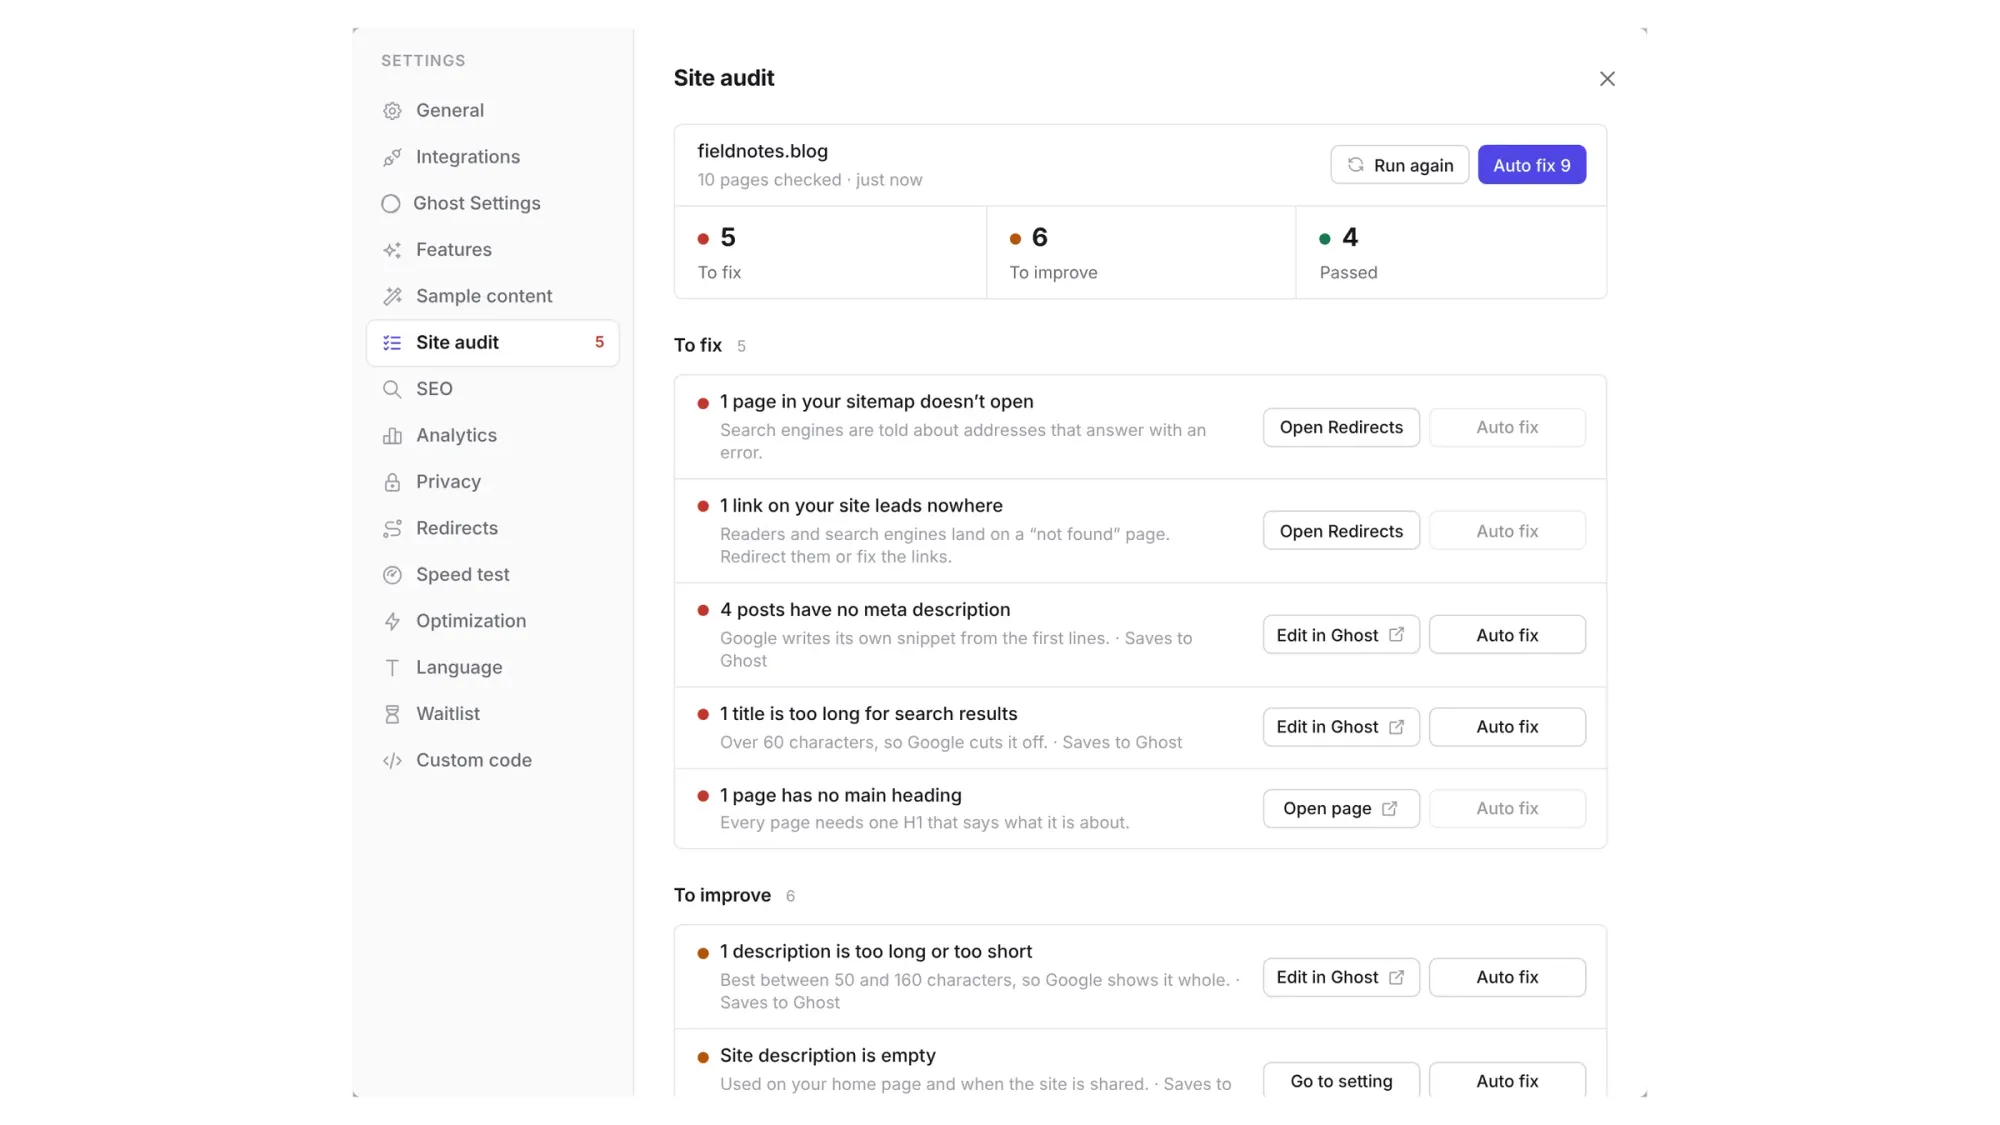
For a swim school, check these first:
- Site description: what you teach and where, like Swim lessons for babies, kids and adults in Austin, TX.
- Sharing image: the picture shown when a parent shares your link in a group chat. A bright photo of the pool works well.
- Page descriptions for pages such as term dates or private lessons.
- Broken links left over from an old site. Send each missing address to the right page under Settings → Redirects.
Auto fix writes the missing descriptions for you. You see every suggestion first, can edit or untick it, and nothing is saved until you click Apply. More in the Site audit guide.
Ready to build yours? Everything in this guide works on your own copy of the Swimming School theme. Start free, connect your Ghost site when you’re ready, and only pay if you like the result.
Next steps
- Change the colors and fonts under Style. They apply to every page at once.
- The footer asks visitors to Get pool news by email. Each address becomes a member of your Ghost site, so you can send term dates and pool news from Ghost Admin under Settings → Newsletters.
- Use the blog (Swim tips in the footer) for term dates, water safety tips and swimmer milestones.
- If your school teaches in a language other than English, translate your theme in one click.
Written by
Founder of Ectobuilder, the AI-powered visual theme editor for Ghost. Indie software builder in Wrocław and co-author of The AdTech Book. I write about Ghost themes, newsletters and building websites with AI.
Comments
Questions or thoughts? Share them below.
Keep reading
PikaPods Custom Domain: Why Only www Works (and How to Fix the Root Domain)
PikaPods maps one custom domain per pod, so yourdomain.com without www stays on a parked page with no SSL. Here's why, and three ways to redirect it to www over HTTPS without touching your email records.
How to Migrate from Kit or beehiiv to Ghost (Subscribers, Paid Members, Posts and Redirects)
Move your newsletter from Kit (ConvertKit) or beehiiv to Ghost step by step: export and import subscribers, deal with paid members and Stripe, bring your posts across, set up redirects and your domain, warm up email sending, and make the new site look right.
How to Use ChatGPT to Create 301 Redirects (Prompts, File Formats and Testing)
Let ChatGPT or Claude match your old URLs to new ones and write the redirect file for Ghost, Apache, Nginx, Netlify or Vercel. Prompts to copy, the mistakes to avoid, and how to test every redirect.